Celebrity News

Mastering Your Conceptual Fashion Shoot: A Step-by-Step Guide

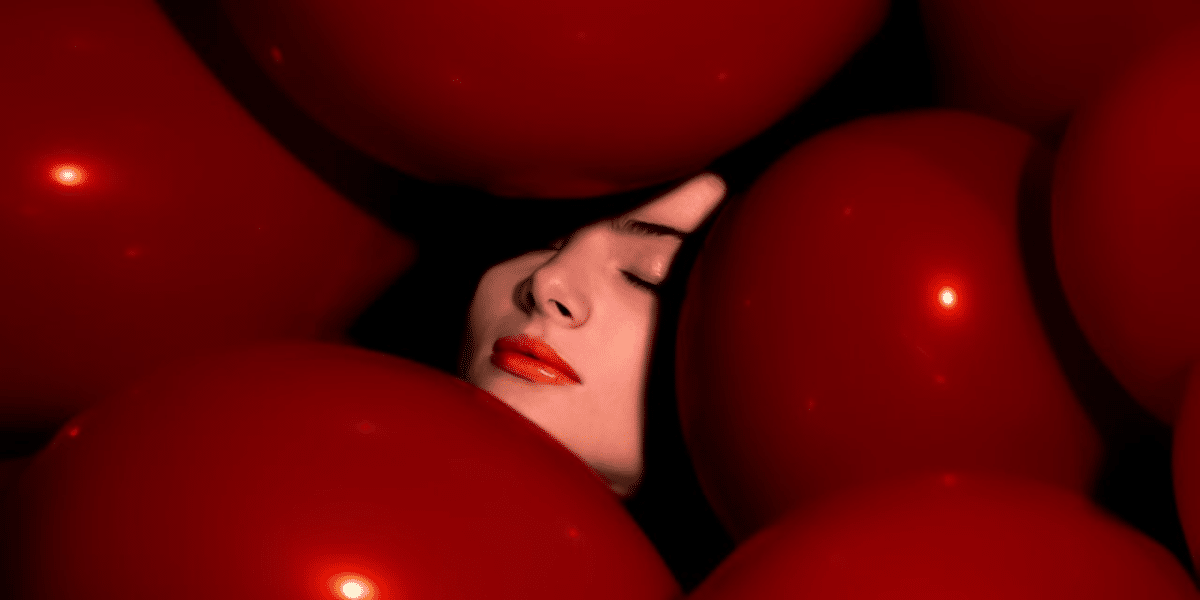
Conceptual fashion shoots offer a unique opportunity to unleash your creativity and showcase your artistic vision. Whether you’re a seasoned fashion photographer or an aspiring enthusiast, planning a successful conceptual fashion shoot requires careful thought, attention to detail, and a clear vision. In this comprehensive guide, we’ll take you through the step-by-step process of planning and executing a conceptual fashion shoot that wows.

1. Define Your Concept

The first step in planning any fashion shoot is to define your concept. Think about the story you want to tell, the mood you want to convey, and the overall aesthetic you’re aiming for. Consider elements such as theme, color palette, and style inspiration. Whether it’s a futuristic sci-fi theme or a whimsical fairy tale concept, clarity on your concept will serve as the foundation for the rest of your planning process.

2. Create a Mood Board

Once you’ve defined your concept, create a mood board to visually articulate your ideas and inspirations. Gather images, colors, textures, and references that align with your concept and evoke the desired mood and style. Mood boards are invaluable tools for communicating your vision to your team, including models, stylists, and hair and makeup artists.

3. Choose Your Location

Selecting the right location is crucial for bringing your concept to life. Consider venues that align with your concept and offer the aesthetic you’re aiming for. Whether it’s an urban cityscape, a lush botanical garden, or a historic mansion, the location should enhance the storytelling and visual impact of your shoot.

4. Scout the Location

Once you’ve chosen your location, take the time to scout the area beforehand. Familiarize yourself with the layout, lighting conditions, and potential shooting spots. Look for interesting backgrounds, textures, and architectural features that you can incorporate into your compositions. Be mindful of logistical considerations such as accessibility, permits, and any restrictions on photography.

5. Assemble Your Team

Collaboration is key to a successful fashion shoot, so assemble your dream team of creative professionals. This may include models, stylists, hair and makeup artists, and assistants. Choose individuals who share your vision and bring unique skills and expertise to the table. Communication and teamwork are essential for bringing your concept to life seamlessly.

6. Plan Your Wardrobe

Selecting the right wardrobe is essential for conveying your concept effectively. Work closely with your stylist to curate looks that align with your theme, mood, and aesthetic. Consider factors such as color, texture, silhouette, and accessories. Ensure that the wardrobe enhances the narrative and visual impact of your shoot while highlighting the personality and individuality of your models.

7. Coordinate Hair and Makeup

Hair and makeup play a significant role in defining the look and feel of your shoot. Collaborate with your hair and makeup artists to create looks that complement your concept and wardrobe. Consider factors such as hairstyle, makeup palette, and overall grooming. Aim for a cohesive and polished appearance that enhances the overall aesthetic of your images.

8. Plan Your Shots

Before the shoot day, plan out the shots you want to capture. Create a shot list detailing each setup, pose, and composition you intend to shoot. This will help you stay organized and efficient on the day of the shoot, ensuring that you capture all the essential images to bring your concept to life.

9. Consider Lighting

Lighting is a crucial element in fashion photography, so consider how you’ll light your scenes to achieve the desired mood and atmosphere. Whether you prefer natural light, studio lighting, or a combination of both, experiment with different setups to create the right ambiance for your shoot. Pay attention to factors such as direction, intensity, and color temperature to enhance the visual impact of your images.

10. Stay Flexible and Adapt

On the day of the shoot, be prepared to adapt and problem-solve as needed. Despite meticulous planning, unexpected challenges may arise, such as changes in weather, wardrobe malfunctions, or unforeseen logistical issues. Stay calm, flexible, and resourceful, and trust in your creative vision and teamwork to overcome any obstacles that may arise.

Be Fearless with Your Conceptual Fashion Shoot

Planning a conceptual fashion shoot requires careful thought, creativity, and collaboration. By defining your concept, creating a mood board, choosing the right location, assembling a talented team, planning your wardrobe and shots, coordinating hair and makeup, considering lighting, and staying flexible and adaptable, you can bring your creative vision to life and capture stunning images that resonate with viewers. With careful planning and execution, your conceptual fashion shoot has the potential to elevate your portfolio, showcase your unique style, and leave a lasting impression in the world of fashion photography.
Mastering the Art of Artificial Lighting in Media: Tips for Creating Compelling Visuals

Artificial lighting plays a crucial role in media production, whether it’s for film, television, photography, or video. When used effectively, artificial lights can enhance storytelling, set the mood, and elevate the overall visual appeal of a production. In this article, we’ll explore some tips for best utilizing artificial lights in media to achieve professional-looking results.

Understand the Basics of Lighting

Before diving into the world of artificial lighting, it’s essential to understand the basics of lighting principles. Learn about key concepts such as color temperature, intensity, direction, and quality of light. Familiarize yourself with different types of artificial lights, including tungsten, fluorescent, LED, and HMI lights, and their respective characteristics. By mastering the fundamentals of lighting, you’ll be better equipped to create compelling visuals that serve your storytelling goals.

Plan Your Lighting Setup in Advance

Effective lighting begins with careful planning. Before you start shooting, take the time to plan your lighting setup based on the specific requirements of your project. Consider factors such as the location, time of day, mood, and tone you want to convey. Create a lighting diagram or storyboard to map out the placement of lights, their angles, and their intended effects. Planning ahead will save you time and effort on set and ensure that you achieve the desired look and feel for your production.

Use Lighting to Create Depth and Dimension

One of the primary functions of artificial lighting in media is to create depth and dimension in your shots. Experiment with different lighting techniques, such as three-point lighting, to add depth and separation between your subject and the background. Use key lights to illuminate your subject, fill lights to reduce harsh shadows, and backlighting to create depth and separation. By strategically positioning lights, you can sculpt the scene and draw the viewer’s eye to specific areas of interest within the frame.

Control the Quality and Direction of Light

The quality and direction of light have a significant impact on the mood and atmosphere of your scene. Experiment with diffusing and shaping light using modifiers such as softboxes, umbrellas, and grids to control the quality of light. Consider the direction of light relative to your subject’s position and adjust accordingly to achieve the desired effect. Whether you’re aiming for soft, flattering light or dramatic, high-contrast shadows, controlling the quality and direction of light is key to creating visually compelling imagery.

Mix Artificial and Natural Light for Cinematic Effects

While artificial lighting is essential for controlling and shaping light in controlled environments, don’t overlook the creative possibilities of mixing artificial and natural light. Experiment with blending artificial lights with available daylight to create cinematic effects and add visual interest to your shots. Use artificial lights to supplement or augment natural light, fill in shadows, or create contrast and drama. By harnessing the best of both worlds, you can achieve dynamic and visually striking results that elevate your production to the next level.

Pay Attention to Color Temperature and White Balance

Color temperature plays a critical role in setting the mood and tone of your scene. Pay attention to the color temperature of your lights and adjust accordingly to achieve the desired look and feel. Match the color temperature of your artificial lights to the ambient light in your scene or use gels to correct for color imbalances. Additionally, ensure that your camera’s white balance is set correctly to accurately reproduce colors and avoid unwanted color casts. Consistent color temperature and white balance are essential for maintaining visual coherence and professionalism in your production.

Experiment and Be Creative

Finally, don’t be afraid to experiment and be creative with your lighting techniques. Every production is unique, and there’s no one-size-fits-all approach to lighting. Don’t be afraid to break the rules and try unconventional lighting setups or techniques to achieve the desired effect. Use light to evoke emotion, create atmosphere, and enhance storytelling in unexpected ways. The more you experiment and push the boundaries of traditional lighting, the more you’ll develop your own unique style and artistic vision as a media creator.

The Undefeated Impact of Artificial Lighting

Artificial lighting is a powerful tool for creating compelling visuals in media production. By understanding the basics of lighting principles, planning your lighting setup in advance, using light to create depth and dimension, controlling the quality and direction of light, mixing artificial and natural light, paying attention to color temperature and white balance, and experimenting with creative lighting techniques, you can achieve professional-looking results that enhance your storytelling and captivate your audience. With practice, patience, and creativity, you can master the art of artificial lighting and take your media productions to new heights.

Mastering the Art of Public Speaking: Essential Tips for Aspiring Celebrities

Public speaking is a crucial skill for anyone looking to make it big in the entertainment industry. Whether you’re addressing a live audience, speaking in interviews, or giving a speech at an award ceremony, the ability to communicate effectively can set you apart. Here are some essential tips for aspiring celebrities to master the art of public speaking.

Why Is Public Speaking Important for Aspiring Celebrities?

Public speaking is more than just talking in front of a crowd. It’s about connecting with your audience, conveying your message clearly, and leaving a lasting impression. For aspiring celebrities, this skill is vital for several reasons.

Firstly, public speaking helps you build a strong personal brand. When you speak confidently and eloquently, you come across as professional and trustworthy. This can enhance your reputation and make you more appealing to fans, media, and industry professionals.

Secondly, being a good public speaker allows you to share your story and values effectively. Whether you’re promoting a new project or advocating for a cause, your ability to articulate your thoughts can inspire and influence others. This can lead to more opportunities and a larger fan base.

Finally, public speaking is an essential part of networking. Industry events, press conferences, and social gatherings often require you to speak in front of others. The better you are at public speaking, the easier it will be to make connections and leave a positive impression.

How Can You Improve Your Public Speaking Skills?

Improving your public speaking skills takes practice and dedication, but the rewards are well worth the effort. Here are some tips to help you become a more effective speaker.

Start by practicing regularly. Like any other skill, public speaking improves with practice. Take every opportunity to speak in front of an audience, no matter how small. This could be at local events, acting classes, or even among friends and family. The more you practice, the more comfortable you will become.

Focus on your body language. Your body language can significantly impact how your message is received. Stand tall, make eye contact, and use hand gestures to emphasize your points. Avoid crossing your arms or fidgeting, as these can make you appear nervous or closed off.

Pay attention to your voice. Your voice is one of your most powerful tools as a speaker. Work on varying your tone, pace, and volume to keep your audience engaged. Practice speaking clearly and projecting your voice so that everyone can hear you.

Prepare thoroughly. Before any speaking engagement, take the time to prepare your material. Know your key points and practice delivering them until you feel confident. If you’re giving a speech, consider writing it out and rehearsing multiple times. Preparation can help reduce anxiety and ensure you stay on track.

Engage with your audience. Connecting with your audience can make your speech more impactful. Start by addressing them directly, asking questions, and encouraging participation. This can make your audience feel involved and more invested in what you have to say.

What Are Common Challenges and How Can You Overcome Them?

Even with practice, public speaking can be challenging. Here are some common obstacles and how to overcome them.

Fear of public speaking is one of the most common challenges. It’s natural to feel nervous before speaking in front of others. To overcome this, try visualization techniques. Imagine yourself giving a successful speech and receiving positive feedback. Deep breathing exercises can also help calm your nerves.

Another challenge is staying focused. It’s easy to get distracted or lose your train of thought, especially if you’re nervous. To stay focused, practice mindfulness techniques such as grounding exercises before your speech. Staying present and aware can help you stay on track.

Handling unexpected situations can also be difficult. You might forget a part of your speech, face technical difficulties, or deal with an unresponsive audience. The key is to stay calm and composed. If you forget something, take a deep breath and move on to the next point. If there’s a technical issue, address it briefly and continue. If the audience isn’t responding, try to engage them with a question or a humorous remark.

Receiving and handling criticism is another hurdle. Not everyone will respond positively to your speech, and that’s okay. Constructive criticism can be a valuable learning tool. Listen to feedback, take note of any recurring themes, and work on those areas. Remember, even the best speakers started somewhere and improved over time.

Mastering the art of public speaking is essential for aspiring celebrities. It enhances your personal brand, allows you to share your story, and helps you build valuable connections. By practicing regularly, focusing on body language and voice, preparing thoroughly, and engaging with your audience, you can become a confident and effective speaker. Overcoming common challenges like fear, staying focused, handling unexpected situations, and dealing with criticism will further hone your skills. With dedication and effort, you can master public speaking and elevate your celebrity status.

Mastering Posing: Easy Tips for Photographers to Capture Stunning Portraits

Understand Your Subject’s Comfort Zone

When it comes to portrait photography, posing your subjects is key to creating captivating and memorable images. Whether you’re working with professional models or everyday people, knowing how to guide and direct your subjects can make all the difference in the final result. In this article, we’ll share some simple yet effective tips for posing subjects in photography that will help you elevate your portrait game and capture stunning photos.

Before you start posing your subject, take a moment to gauge their comfort level and preferences. Some people may feel awkward or self-conscious in front of the camera, while others may be more relaxed and confident. By establishing a rapport with your subject and making them feel at ease, you’ll be able to capture more natural and authentic expressions.

Start with the Basics

When posing your subject, it’s helpful to start with some basic poses and then gradually build upon them. Begin with simple standing or sitting poses, and then experiment with variations such as different angles, hand placements, and facial expressions. Encourage your subject to relax and move naturally, rather than forcing them into rigid or uncomfortable positions.

Incorporating props and accessories into your portraits can add visual interest and depth to your images. Whether it’s a bouquet of flowers, a hat, or a chair, props can help tell a story and convey a mood or theme. Be creative and think outside the box when choosing props, and don’t be afraid to experiment with different combinations to see what works best for your subject and the overall aesthetic of the photo.

Pay Attention to Body Language

Body language plays a crucial role in conveying emotion and personality in portrait photography. Encourage your subject to relax their shoulders, stand tall, and engage with the camera with confidence. Pay attention to the position of their arms, hands, and feet, and make subtle adjustments as needed to create a more flattering and dynamic pose.

The eyes are often referred to as the windows to the soul, and facial expressions can make or break a portrait. Encourage your subject to express genuine emotions and connect with the camera through their eyes and smile. Experiment with different expressions, from serious and contemplative to joyful and playful, and capture the moments that feel most authentic and compelling.

While posed portraits can be beautiful, don’t be afraid to embrace movement and spontaneity in your photography. Encourage your subject to walk, dance, or interact with their surroundings, and be ready to capture candid moments as they unfold. These unscripted moments can often result in some of the most memorable and impactful images.

Practice, Practice, Practice

As with any skill, mastering the art of posing takes time and practice. Take every opportunity to work with different subjects, experiment with poses and techniques, and review your images to learn from your successes and mistakes. Don’t be afraid to step out of your comfort zone and try new things, and remember that each photo shoot is an opportunity to grow and improve as a photographer.

Posing subjects in photography is both an art and a science. By understanding your subject’s comfort zone, starting with the basics, using props and accessories, paying attention to body language and facial expressions, embracing movement and candid moments, and practicing regularly, you can elevate your portrait photography skills and capture stunning images that truly resonate with viewers. So grab your camera, find your muse, and start posing!

Mastering Shutter Speed: A Beginner’s Guide to Capturing Perfect Photos

Shutter speed is one of the most critical aspects of photography, yet it can be daunting for beginners to understand and utilize effectively. In this beginner-friendly guide, we’ll demystify shutter speed and provide practical tips on how to best utilize it to capture stunning photos.

What is Shutter Speed?

Before we dive into how to use shutter speed effectively, let’s first understand what it is. Shutter speed refers to the amount of time that the camera’s shutter remains open when taking a photo. It controls the duration of exposure, determining how long the camera sensor is exposed to light. Shutter speed is measured in seconds or fractions of a second, such as 1/1000s, 1/250s, or 1s.

The Relationship Between Shutter Speed and Exposure

Shutter speed plays a crucial role in determining the exposure of a photograph. A faster shutter speed lets in less light, resulting in a darker image, while a slower shutter speed allows more light to enter, producing a brighter image. Understanding how shutter speed affects exposure is essential for achieving proper exposure in your photos.

Freezing Motion with Fast Shutter Speeds

One of the key benefits of using a fast shutter speed is the ability to freeze motion in your photos. Fast-moving subjects, such as sports athletes or wildlife, can be captured sharply and crisply with a fast shutter speed. Generally, shutter speeds of 1/500s or faster are recommended for freezing motion effectively.

Creating Motion Blur with Slow Shutter Speeds

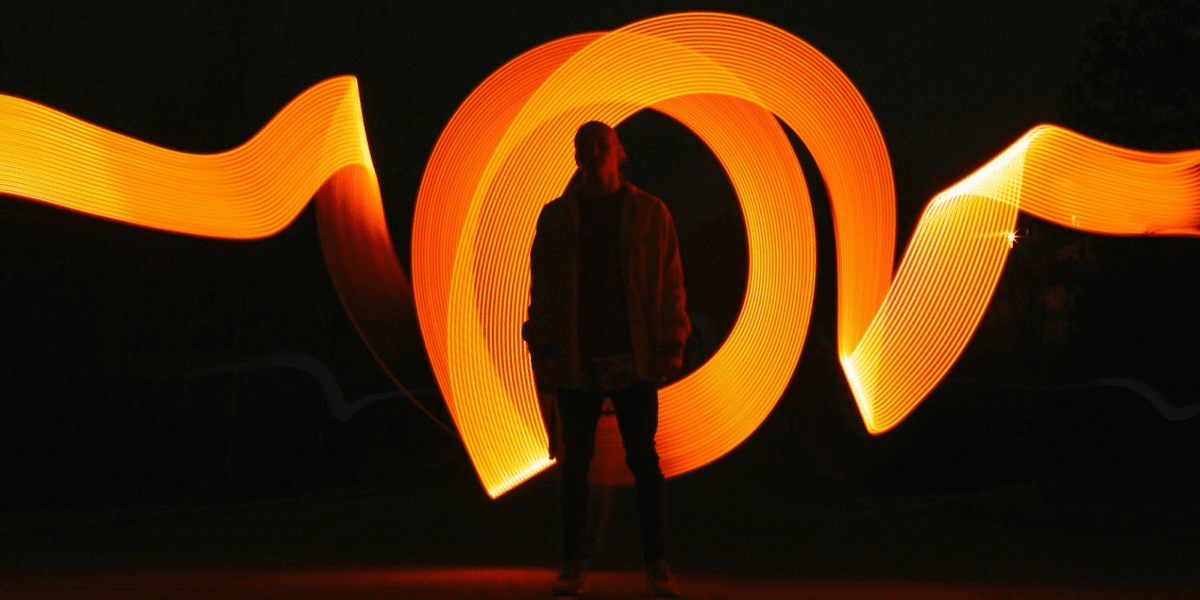
Conversely, slow shutter speeds can be used to create motion blur in your photos, adding a sense of movement and dynamism. This technique is often employed in landscape photography to capture the movement of flowing water or in nighttime photography to create light trails from moving vehicles. Experimenting with slow shutter speeds can yield captivating and artistic results.

Adjusting Shutter Speed for Low Light Conditions

In low light conditions, such as indoors or during dusk or dawn, a slower shutter speed may be necessary to allow enough light to reach the camera sensor. However, using a slow shutter speed handheld can lead to blurry images due to camera shake. In these situations, consider using a tripod to stabilize the camera or increasing the ISO sensitivity to compensate for the reduced light.

Balancing Shutter Speed with Aperture and ISO

Achieving the perfect exposure requires finding the right balance between shutter speed, aperture, and ISO sensitivity. Aperture controls the amount of light entering the lens, while ISO sensitivity determines the camera sensor’s sensitivity to light. By adjusting these three settings in tandem, you can achieve the desired exposure for your photos while maintaining optimal image quality.

Tips for Using Shutter Speed Effectively

Now that we’ve covered the basics of shutter speed, here are some practical tips for using it effectively in your photography:

  • Understand Your Camera’s Shutter Speed Settings: Familiarize yourself with your camera’s shutter speed settings and how to adjust them manually.
  • Use Shutter Priority Mode: If you’re new to manual photography, consider using shutter priority mode (denoted as Tv or S on most cameras), which allows you to set the desired shutter speed while the camera automatically adjusts the aperture for proper exposure.
  • Experiment with Different Shutter Speeds: Don’t be afraid to experiment with different shutter speeds to see how they affect your photos. Try capturing fast-moving subjects with fast shutter speeds and creating motion blur with slow shutter speeds.
  • Stabilize Your Camera: When using slow shutter speeds, such as for long exposures or in low light conditions, use a tripod or stable surface to prevent camera shake and ensure sharp images.
  • Consider the Creative Effect: Think about the creative effect you want to achieve with your photos and adjust the shutter speed accordingly. Whether it’s freezing action, capturing motion blur, or experimenting with long exposures, tailor your shutter speed to suit your artistic vision.

Shutter Speed: an Essential Tool in Photography

Mastering shutter speed is essential for any photographer looking to take their skills to the next level. By understanding how shutter speed affects exposure, motion, and creativity, you can confidently control this fundamental aspect of photography to capture stunning and impactful images. So grab your camera, experiment with different shutter speeds, and unleash your creativity behind the lens!

Mastering Male Model Direction: Tips for a Successful Photoshoot

Directing male models in a photoshoot requires skill, creativity, and clear communication. Whether you’re a seasoned photographer or just starting out, effectively guiding male models can make all the difference in capturing stunning images that resonate with your audience. In this article, we’ll explore some practical tips and techniques for directing male models to ensure a successful and memorable photoshoot.

1. Establish a Connection

Before diving into the shoot, take the time to establish a connection with the male model. Introduce yourself, chat casually, and make them feel comfortable and at ease in front of the camera. Building rapport and trust is essential for creating a collaborative environment where both you and the model can freely express ideas and creativity.

2. Understand Their Comfort Zone

Every male model has their comfort zone when it comes to posing and expression. Take the time to understand their preferences, strengths, and areas for improvement. Some models may feel more confident in certain poses or facial expressions, while others may need more guidance and direction. Tailor your approach accordingly to ensure the model feels empowered and confident throughout the shoot.

3. Provide Clear Direction

Clear and concise direction is key to a successful photoshoot. Be specific about what you want the model to do, whether it’s adjusting their posture, changing their expression, or interacting with props or other elements in the scene. Use simple, straightforward language and demonstrate poses or expressions if needed to ensure the model understands your vision and can execute it effectively.

4. Showcase Their Personality

Encourage male models to showcase their personality and individuality in front of the camera. Whether they’re serious, playful, or expressive, embracing their unique traits can add depth and authenticity to the images. Encourage them to experiment with different poses, expressions, and movements to find what feels most natural and genuine to them.

5. Focus on Body Language

Body language plays a crucial role in conveying emotion and storytelling in photography. Pay attention to the male model’s body language and posture, ensuring they convey the desired mood and message of the shoot. Guide them in adjusting their stance, positioning their limbs, and engaging their muscles to create dynamic and visually interesting compositions.

6. Use Visual References

Visual references can be incredibly helpful in guiding male models and communicating your vision for the shoot. Show them examples of poses, expressions, or mood boards that inspire you and align with the concept of the shoot. This can help the model understand the aesthetic you’re aiming for and provide a reference point for them to draw inspiration from.

7. Provide Positive Feedback

Positive reinforcement is essential for boosting the male model’s confidence and morale throughout the shoot. Offer praise and encouragement for their efforts, acknowledging when they nail a pose or expression. Constructive feedback should also be provided when needed, but always be mindful of delivering it in a constructive and supportive manner.

8. Be Flexible and Adapt

Flexibility is key in directing male models, as each shoot comes with its own unique challenges and opportunities. Be prepared to adapt your approach based on the model’s feedback, environmental conditions, or unforeseen circumstances that may arise during the shoot. Stay open-minded and flexible, embracing spontaneity and creativity to capture authentic and compelling images.

9. Collaborate with the Team

Collaboration is essential for a successful photoshoot, so be sure to involve other members of your team, such as stylists, hair and makeup artists, and assistants. Communicate your vision and direction clearly with the team, and encourage input and ideas from everyone involved. Working together as a cohesive unit can elevate the quality of the shoot and ensure a seamless and enjoyable experience for everyone involved.

10. Have Fun!

Most importantly, remember to have fun during the shoot! A positive and upbeat atmosphere can make all the difference in capturing genuine smiles and expressions from the male model. Keep the energy high, maintain a sense of humor, and enjoy the creative process together. When everyone is relaxed and enjoying themselves, it shines through in the final images.

Male Models Can Make for Compelling Shots

Directing male models in a photoshoot requires a combination of technical skill, creativity, and interpersonal communication. By establishing a connection, providing clear direction, showcasing their personality, and fostering a collaborative environment, you can ensure a successful and memorable photoshoot that produces stunning images. With practice, patience, and a passion for storytelling, you can master the art of directing male models and create compelling and visually captivating photographs that leave a lasting impression.

Mastering Lighting Techniques to Elevate Your Photography

Unveiling the Artistry Behind Light in Photography

Photography is not just about capturing moments; it’s an art of playing with light. From the gentle touch of natural sunlight to the vibrant hues of artificial sources, understanding and mastering lighting techniques can transform your photos into visual masterpieces. Let’s embark on a journey to unravel the secrets of creative lighting and how it can elevate your photography.

The Dance of Natural Light

Natural light is a photographer’s best friend. It brings out the true colors and textures in your subjects. Understanding the nuances of natural light, such as the golden hour during sunrise or sunset, allows you to capture stunning images with warm tones and soft shadows. Experimenting with different angles and positions in relation to the sun can create captivating effects, enhancing the overall mood of your photographs.

Harnessing the Power of Artificial Lighting

Artificial lighting opens up a world of possibilities for photographers. Whether it’s the soft glow of studio lights, the directional focus of a spotlight, or the warm ambiance of tungsten bulbs, artificial sources provide unmatched control over the illumination of your scenes. Learning how to manipulate artificial light sources enables you to highlight specific elements, create dramatic contrasts, and infuse your photos with a unique character.

Playing with Shadows and Highlights

Understanding the interplay between shadows and highlights is crucial for achieving balance in your compositions. Shadows add depth and dimension, emphasizing textures and contours. Experimenting with different light angles can create intriguing shadows, adding a layer of visual interest to your photographs. Balancing shadows with well-placed highlights ensures that no detail goes unnoticed, resulting in a harmonious and visually appealing image.

Embracing Low Light Photography

Low light conditions, often considered challenging, offer a canvas for creativity. Mastering low light photography involves making the most of available light sources or incorporating artificial lighting for a desired effect. Techniques such as using a wider aperture, higher ISO, and longer exposure times can help capture stunning images in low light environments, unveiling the beauty hidden in the shadows.

Enhancing Portraits with Lighting Techniques

In portraiture, lighting can make or break the mood of the photograph. Experimenting with portrait lighting techniques allows you to sculpt the face, highlight features, and convey specific emotions. Techniques like Rembrandt lighting, where a triangle of light appears on one side of the face, or softbox lighting for a diffused, flattering glow, add an artistic touch to your portrait photography.

Practical Tips for Creative Lighting

  1. Experiment with Angles: Change the angle of your light source to create different shadows and highlights.
  2. Use Reflectors: Reflectors bounce light back onto your subject, filling in shadows and adding a natural glow.
  3. Understand White Balance: Adjusting white balance ensures accurate color representation under different lighting conditions.
  4. Combine Natural and Artificial Light: Blend natural and artificial light sources for a dynamic and captivating effect.

Painting with Light

As you dive into the world of creative lighting, remember that each photograph is a canvas waiting to be painted with light. Whether you’re capturing the soft glow of a sunrise or sculpting a dramatic scene with artificial lighting, mastering these techniques empowers you to tell stories, evoke emotions, and create visually stunning images. Illuminate your creativity, and let the play of light elevate your photography to new heights.

Mastering Low Light Fashion Photography: Tips for Capturing Stunning Shots

Low light conditions can present a challenge for photographers, but with the right techniques and approach, you can still capture stunning fashion shots that showcase your creativity and style. In this article, we’ll explore some practical tips and tricks for making the most out of low light fashion shoots, from choosing the right equipment to mastering lighting techniques and posing your models.

1. Choose the Right Equipment

When shooting in low light conditions, having the right equipment can make all the difference. Invest in a camera with good low light performance and a wide aperture lens that allows more light to reach the sensor. Consider using a prime lens with a large aperture (e.g., f/1.8 or f/2.8) for better light sensitivity and sharper images in low light situations.

2. Use Available Light Wisely

In low light fashion shoots, available light is your best friend. Look for sources of natural light, such as windows, doorways, or skylights, and position your model strategically to make the most of the available light. Experiment with different angles and directions to create interesting shadows and highlights that add depth and dimension to your images.

3. Experiment with Artificial Lighting

In addition to natural light, consider using artificial lighting sources such as continuous or strobe lights to supplement or enhance the available light. Experiment with different lighting setups, such as softboxes, umbrellas, or beauty dishes, to create flattering and dramatic lighting effects that complement the mood and style of your fashion shoot.

4. Master Exposure Settings

Understanding exposure settings is crucial for achieving well-exposed images in low light conditions. Experiment with different shutter speeds, apertures, and ISO settings to find the optimal exposure for your images. Keep in mind that higher ISO settings can introduce noise, so aim to strike a balance between exposure and image quality.

5. Embrace the Shadows

In low light fashion photography, shadows can be just as important as light. Embrace the shadows to create depth and drama in your images, adding visual interest and intrigue to your compositions. Experiment with backlighting, sidelighting, and rim lighting techniques to create dynamic and captivating silhouettes that highlight the contours and shapes of your models.

6. Use Reflectors and Diffusers

Reflectors and diffusers are invaluable tools for manipulating and controlling light in low light fashion shoots. Use reflectors to bounce light onto your subject and fill in shadows, or use diffusers to soften harsh light and create a more flattering and natural-looking illumination. Experiment with different sizes, shapes, and materials to achieve the desired lighting effect.

7. Direct Your Models

Posing your models effectively is key to creating striking and dynamic fashion shots in low light conditions. Provide clear direction and guidance to your models, instructing them on how to pose, move, and interact with the environment. Experiment with different poses, expressions, and gestures to convey mood and emotion in your images.

8. Shoot in RAW

When shooting in low light conditions, shooting in RAW format allows you to capture more image data and retain greater flexibility in post-processing. RAW files contain more dynamic range and detail, making them ideal for editing and adjusting exposure, white balance, and other parameters in post-production.

9. Practice Patience and Persistence

Low light fashion photography requires patience and persistence to achieve the desired results. Be prepared to experiment with different techniques, settings, and compositions until you find the perfect shot. Don’t be afraid to take multiple shots and try different angles and perspectives to capture the best possible image.

10. Post-Processing Techniques

Post-processing can help enhance and refine your low light fashion shots, bringing out details, colors, and textures that may be obscured in the original image. Experiment with editing software such as Adobe Lightroom or Photoshop to adjust exposure, contrast, color balance, and other parameters to achieve the desired look and feel for your images.

Low Light Can Leave an Impression

Low light fashion photography presents its own set of challenges and opportunities, but with the right techniques and approach, you can still capture stunning and visually captivating images that showcase your creativity and style. By choosing the right equipment, mastering lighting techniques, directing your models effectively, and practicing patience and persistence, you can make the most out of low light fashion shoots and create images that leave a lasting impression. With practice, experimentation, and a passion for storytelling, you can elevate your low light fashion photography to new heights and create images that truly stand out from the crowd.

Mastering Conceptual Indoor Photography: Tips for Setting Up Your Shoot

Conceptual indoor photography offers endless opportunities for creativity and storytelling. Whether you’re a professional photographer or an amateur enthusiast, setting up a successful conceptual indoor shoot requires careful planning, attention to detail, and a dash of imagination. In this article, we’ll explore some practical tips and techniques for setting up your indoor shoot and bringing your creative vision to life.

1. Choose the Right Location

The first step in setting up a conceptual indoor shoot is choosing the right location. Consider the theme and concept of your shoot and look for a setting that complements and enhances your vision. Whether it’s a cozy living room, a stylish studio, or a rustic attic, the location should provide the backdrop and atmosphere you need to tell your story effectively.

2. Plan Your Concept

Before diving into the shoot, take the time to plan out your concept and vision. Think about the mood, tone, and message you want to convey through your images. Create a mood board or inspiration board to gather ideas, themes, colors, and visual references that align with your concept. This will serve as a roadmap for the shoot and help you stay focused and organized throughout the process.

3. Gather Props and Accessories

Props and accessories play a crucial role in setting the scene and adding depth and context to your images. Consider the elements you need to bring your concept to life, such as furniture, decor, clothing, or thematic objects. Scour thrift stores, flea markets, or your own home for unique and interesting props that fit your concept and add visual interest to your compositions.

4. Set Up Your Lighting

Lighting is key to creating mood, atmosphere, and depth in indoor photography. Experiment with different lighting setups, such as natural light, artificial light, or a combination of both, to achieve the desired look and feel for your images. Consider factors such as intensity, direction, and color temperature to create the right ambiance and highlight key elements in your compositions.

5. Consider Composition and Framing

Composition plays a crucial role in conveying your concept and guiding the viewer’s eye through your images. Experiment with different angles, perspectives, and framing techniques to create dynamic and visually engaging compositions. Consider factors such as symmetry, balance, leading lines, and negative space to create visual interest and draw attention to your subject.

6. Direct Your Models

If your shoot involves models or subjects, provide clear direction and guidance to help them convey the desired mood and emotions. Communicate openly with your models about the concept, theme, and narrative of the shoot, and encourage them to express themselves authentically. Experiment with different poses, gestures, and expressions to capture the right moment and emotion.

7. Pay Attention to Detail

In conceptual indoor photography, the devil is in the details, so pay close attention to every aspect of your scene. Take the time to arrange props, adjust lighting, and fine-tune compositions to ensure that every element contributes to the overall narrative and aesthetic. Don’t be afraid to experiment with different arrangements and configurations until you achieve the perfect balance and harmony in your images.

8. Experiment with Techniques

Conceptual indoor photography offers plenty of opportunities to experiment with different techniques and effects. Try incorporating techniques such as long exposure, multiple exposures, or creative post-processing to add visual interest and depth to your images. Don’t be afraid to push the boundaries and try new things to create truly unique and captivating photos.

9. Stay Flexible and Adapt

Flexibility is key to a successful indoor shoot, as unexpected challenges and opportunities can arise at any moment. Be prepared to adapt and improvise as needed, whether it’s adjusting lighting, rearranging props, or changing compositions on the fly. Stay open-minded and flexible, and embrace the creative process as it unfolds.

10. Review and Refine

After the shoot, take the time to review your images and identify areas for improvement. Look for strengths and weaknesses in your compositions, lighting, and storytelling, and use this feedback to refine your approach for future shoots. Don’t be afraid to seek feedback from others, whether it’s fellow photographers, friends, or clients, to gain new insights and perspectives.

Pushing Boundaries with Conceptual Settings

Setting up a successful conceptual indoor shoot requires careful planning, creativity, and attention to detail. By choosing the right location, planning your concept, gathering props and accessories, setting up your lighting, and directing your models effectively, you can bring your creative vision to life and capture stunning images that tell a compelling story. With practice, experimentation, and a willingness to push the boundaries of your creativity, you can master the art of conceptual indoor photography and create images that leave a lasting impression on viewers.

Mastering Fashion Photography: Using Cool Colors to Elevate Your Shoot

Fashion photography is all about capturing the essence of style and elegance, and one effective way to achieve this is by using cool colors in your photoshoots. Cool colors, such as blues, greens, and purples, evoke a sense of calmness and tranquility, adding a touch of sophistication and refinement to your images. In this article, we’ll explore some practical tips and techniques for utilizing cool colors in your fashion shoots to create stunning and visually captivating photographs.

1. Choose the Right Location

Selecting the perfect location is essential for setting the tone and atmosphere of your fashion shoot. Look for outdoor settings with natural elements that complement cool colors, such as bodies of water, lush greenery, or urban landscapes with cool-toned architecture. Alternatively, you can opt for indoor locations with neutral or cool-colored backdrops, such as white or gray walls, to create a clean and modern aesthetic for your photoshoot.

2. Wardrobe Selection

When styling your models for the shoot, choose outfits that incorporate cool-colored clothing and accessories. Experiment with different shades of blue, green, and purple to create visually interesting and harmonious color combinations. Consider the overall mood and theme of the shoot when selecting wardrobe pieces, and aim for a cohesive look that complements the cool color palette and enhances the overall aesthetic of the photographs.

3. Play with Lighting

Lighting plays a crucial role in fashion photography and can greatly influence the way cool colors appear in your images. Experiment with natural light, artificial lighting, and reflectors to achieve the desired look and feel for your photoshoot. For outdoor shoots, aim to capture soft, diffused light during the golden hour (early morning or late afternoon) to enhance the cool tones in your images. In indoor settings, use softbox or LED lights to create a flattering and evenly lit environment for your models.

4. Consider Background and Props

Incorporate cool-colored backgrounds and props into your photoshoot to complement the wardrobe and enhance the overall visual impact of the images. Look for backgrounds with interesting textures or patterns in shades of blue, green, or purple that add depth and dimension to your photos. Experiment with props such as scarves, hats, or jewelry in cool tones to add visual interest and create focal points within the frame.

5. Experiment with Composition

Experiment with different compositions and angles to create dynamic and visually striking images. Explore close-up shots to capture intricate details and textures in the clothing and accessories, or try wide-angle shots to showcase the overall mood and atmosphere of the shoot. Play with symmetry, leading lines, and negative space to create visually balanced and aesthetically pleasing compositions that draw the viewer’s eye to the cool-colored elements in the frame.

6. Post-Processing Techniques

Use post-processing techniques to enhance the cool colors in your photoshoot and achieve the desired aesthetic. Experiment with color grading tools in editing software such as Adobe Lightroom or Photoshop to adjust the hue, saturation, and luminance of individual color channels. Consider adding subtle blue or teal tones to the shadows and highlights to create a cohesive and harmonious color palette that reinforces the cool theme of the shoot.

7. Model Posing and Expression

Guide your models in posing and expression to convey the mood and vibe of the shoot. Encourage relaxed and confident poses that complement the cool color palette and evoke a sense of ease and sophistication. Pay attention to facial expressions and body language to capture authentic emotions and connections that resonate with the viewer. Remember that the models are an integral part of the overall composition, and their presence should enhance the cool, refined aesthetic of the images.

8. Collaborate with a Team

Collaborate with a team of creative professionals, including stylists, hair and makeup artists, and assistants, to bring your vision to life. Communicate your ideas and inspirations clearly with the team and encourage open dialogue and feedback throughout the process. By working together, you can leverage each other’s expertise and creativity to create cohesive and visually stunning fashion images that showcase the beauty and elegance of cool colors.

Cool Colors: A Powerful Visual Tool

Utilizing cool colors in your fashion shoots is a powerful way to create visually captivating and aesthetically pleasing images that evoke a sense of calmness, sophistication, and refinement. By carefully selecting locations, wardrobe, lighting, compositions, post-processing techniques, and collaborating with a team of creative professionals, you can create stunning fashion photographs that showcase the beauty and elegance of cool colors. Experiment with different ideas and techniques, and don’t be afraid to push the boundaries of creativity to create images that leave a lasting impression on viewers and resonate with your audience.